


How to Add a New Grid to Your Viewer: A Step-by-Step Guide

One of the great advantages of the OpenSimulator ecosystem is the freedom to visit multiple grids using a single viewer and a single installation. Whether you’re joining a new grid for the first time or just adding another destination to your list, the process takes only a minute or two. This guide walks you through it step by step. The screenshots shown are from the Singularity Viewer, but other viewers will be similar as they all share the same “Base” code.
Before You Begin
You’ll need one piece of information before you start: the Login URI of the grid you want to add. This is a web address that typically looks like this:
http://yourgrid.com:8002/
Most grids will publish their Login URI on their website, usually on a “How to Connect” or “Getting Started” page. If you can’t find it, contact the grid’s support team and they’ll provide it.
Step 1 — Open the Grids panel in Preferences
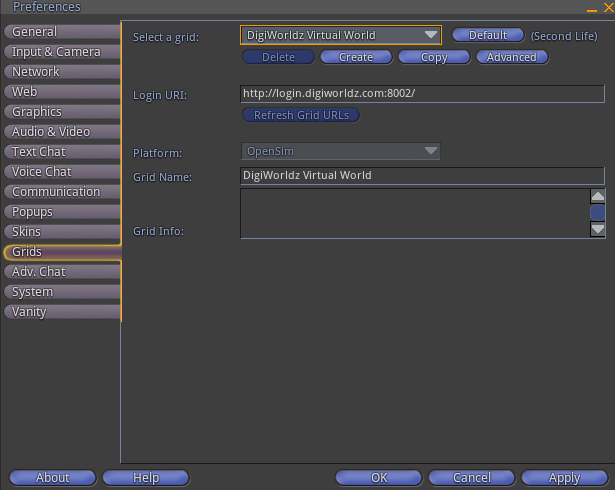
Launch Singularity. At the login screen, click Edit in the top menu bar, then select Preferences. In the Preferences window, click Grids in the left-hand sidebar.
You will see a screen showing your currently configured grids, with DigiWorldz Virtual World (or whichever grid you last used) shown in the Select a grid dropdown at the top.
Step 2 — Create a new grid entry
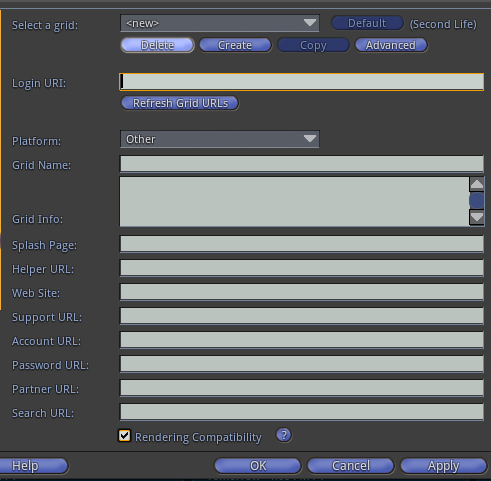
Click the Create button near the top of the Grids panel. The dropdown will change to show <new> and all the fields below will clear, ready for your input.
Step 3 — Enter the Login URI
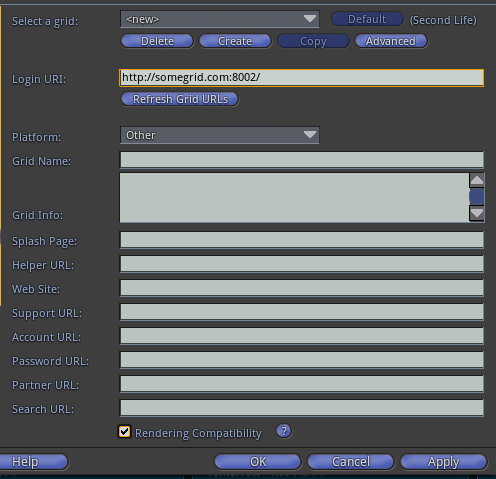
Click into the Login URI field and type or paste the Login URI for the grid you want to add. For example:
http://somegrid.com:8002/
Make sure to include the port number (usually :8002) and the trailing slash. Your screen should look like this:
Step 4 — Set the Platform to OpenSim
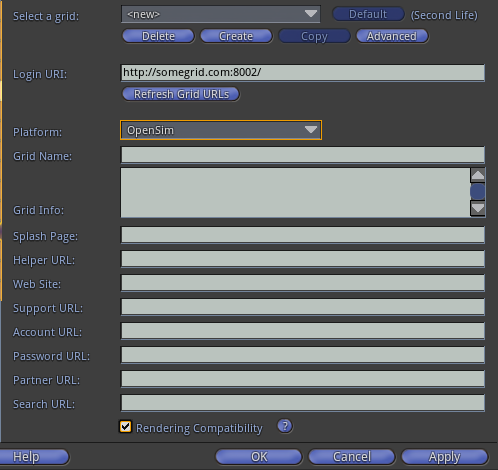
Click the Platform dropdown and change it from Other to OpenSim. This ensures the viewer handles the connection correctly for OpenSimulator-based grids.
Step 5 — Fetch the grid information
Click the Refresh Grid URLs button. Singularity will contact the grid’s servers and automatically populate the Grid Name and remaining URL fields with the correct information. This requires the grid to be online at the time, so if the fields don’t populate, check that you’ve entered the URI correctly and try again.
Step 6 — Save and log in
Click Apply, then OK to close the Preferences window. Back at the login screen, click the Grid or Login URI dropdown (shown in Image 1) and select your newly added grid from the list. Enter your avatar name and password for that grid and click Log In.